Teaching Letterpress with the Bookbeetle Press
As some context for this exercise: the letterpress in the Maker Studio was set up using this guide from Cait Coker, which has been invaluable to me as I work through this on my own. We have discussed teaching with letterpress before. This post is about doing it in a multimodal format with a 1-to-25 teacher-to-student ratio. This is more challenging than any other experience I’ve had as an amateur printer, and I wouldn’t say it’s better than doing it with a lower ratio or more equipment. However, it can be done, and I’ll walk through how I did it.
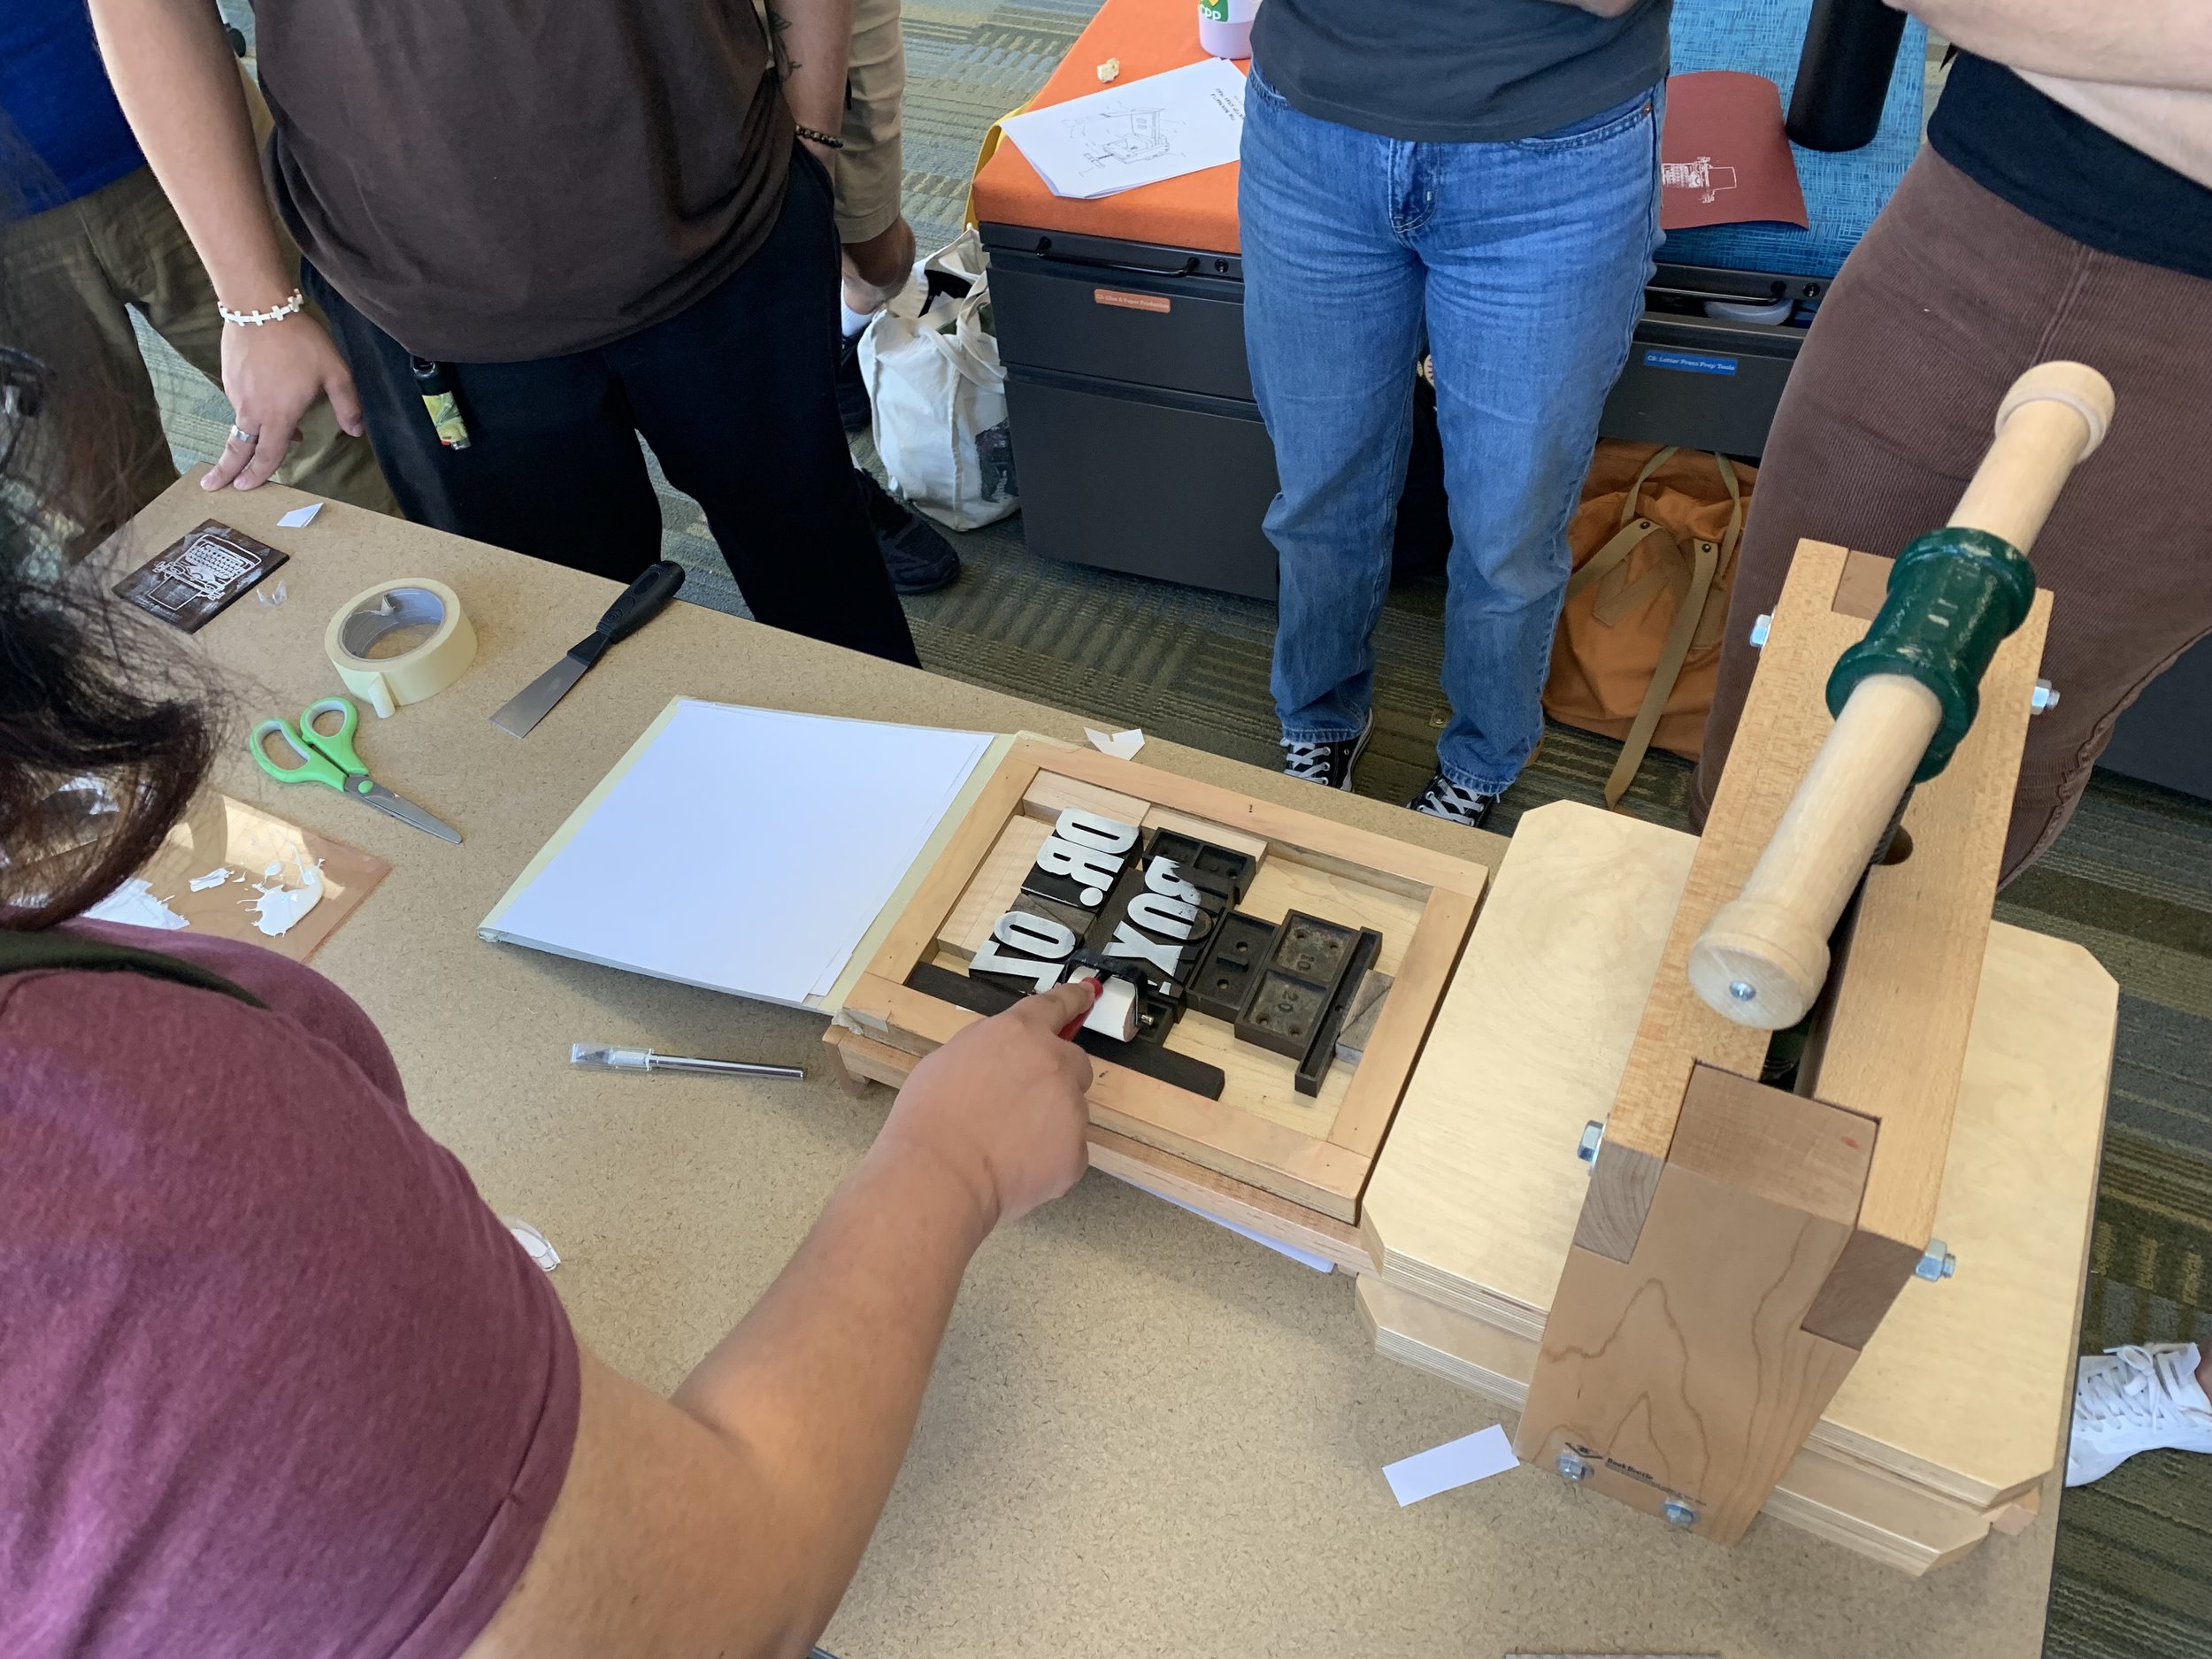
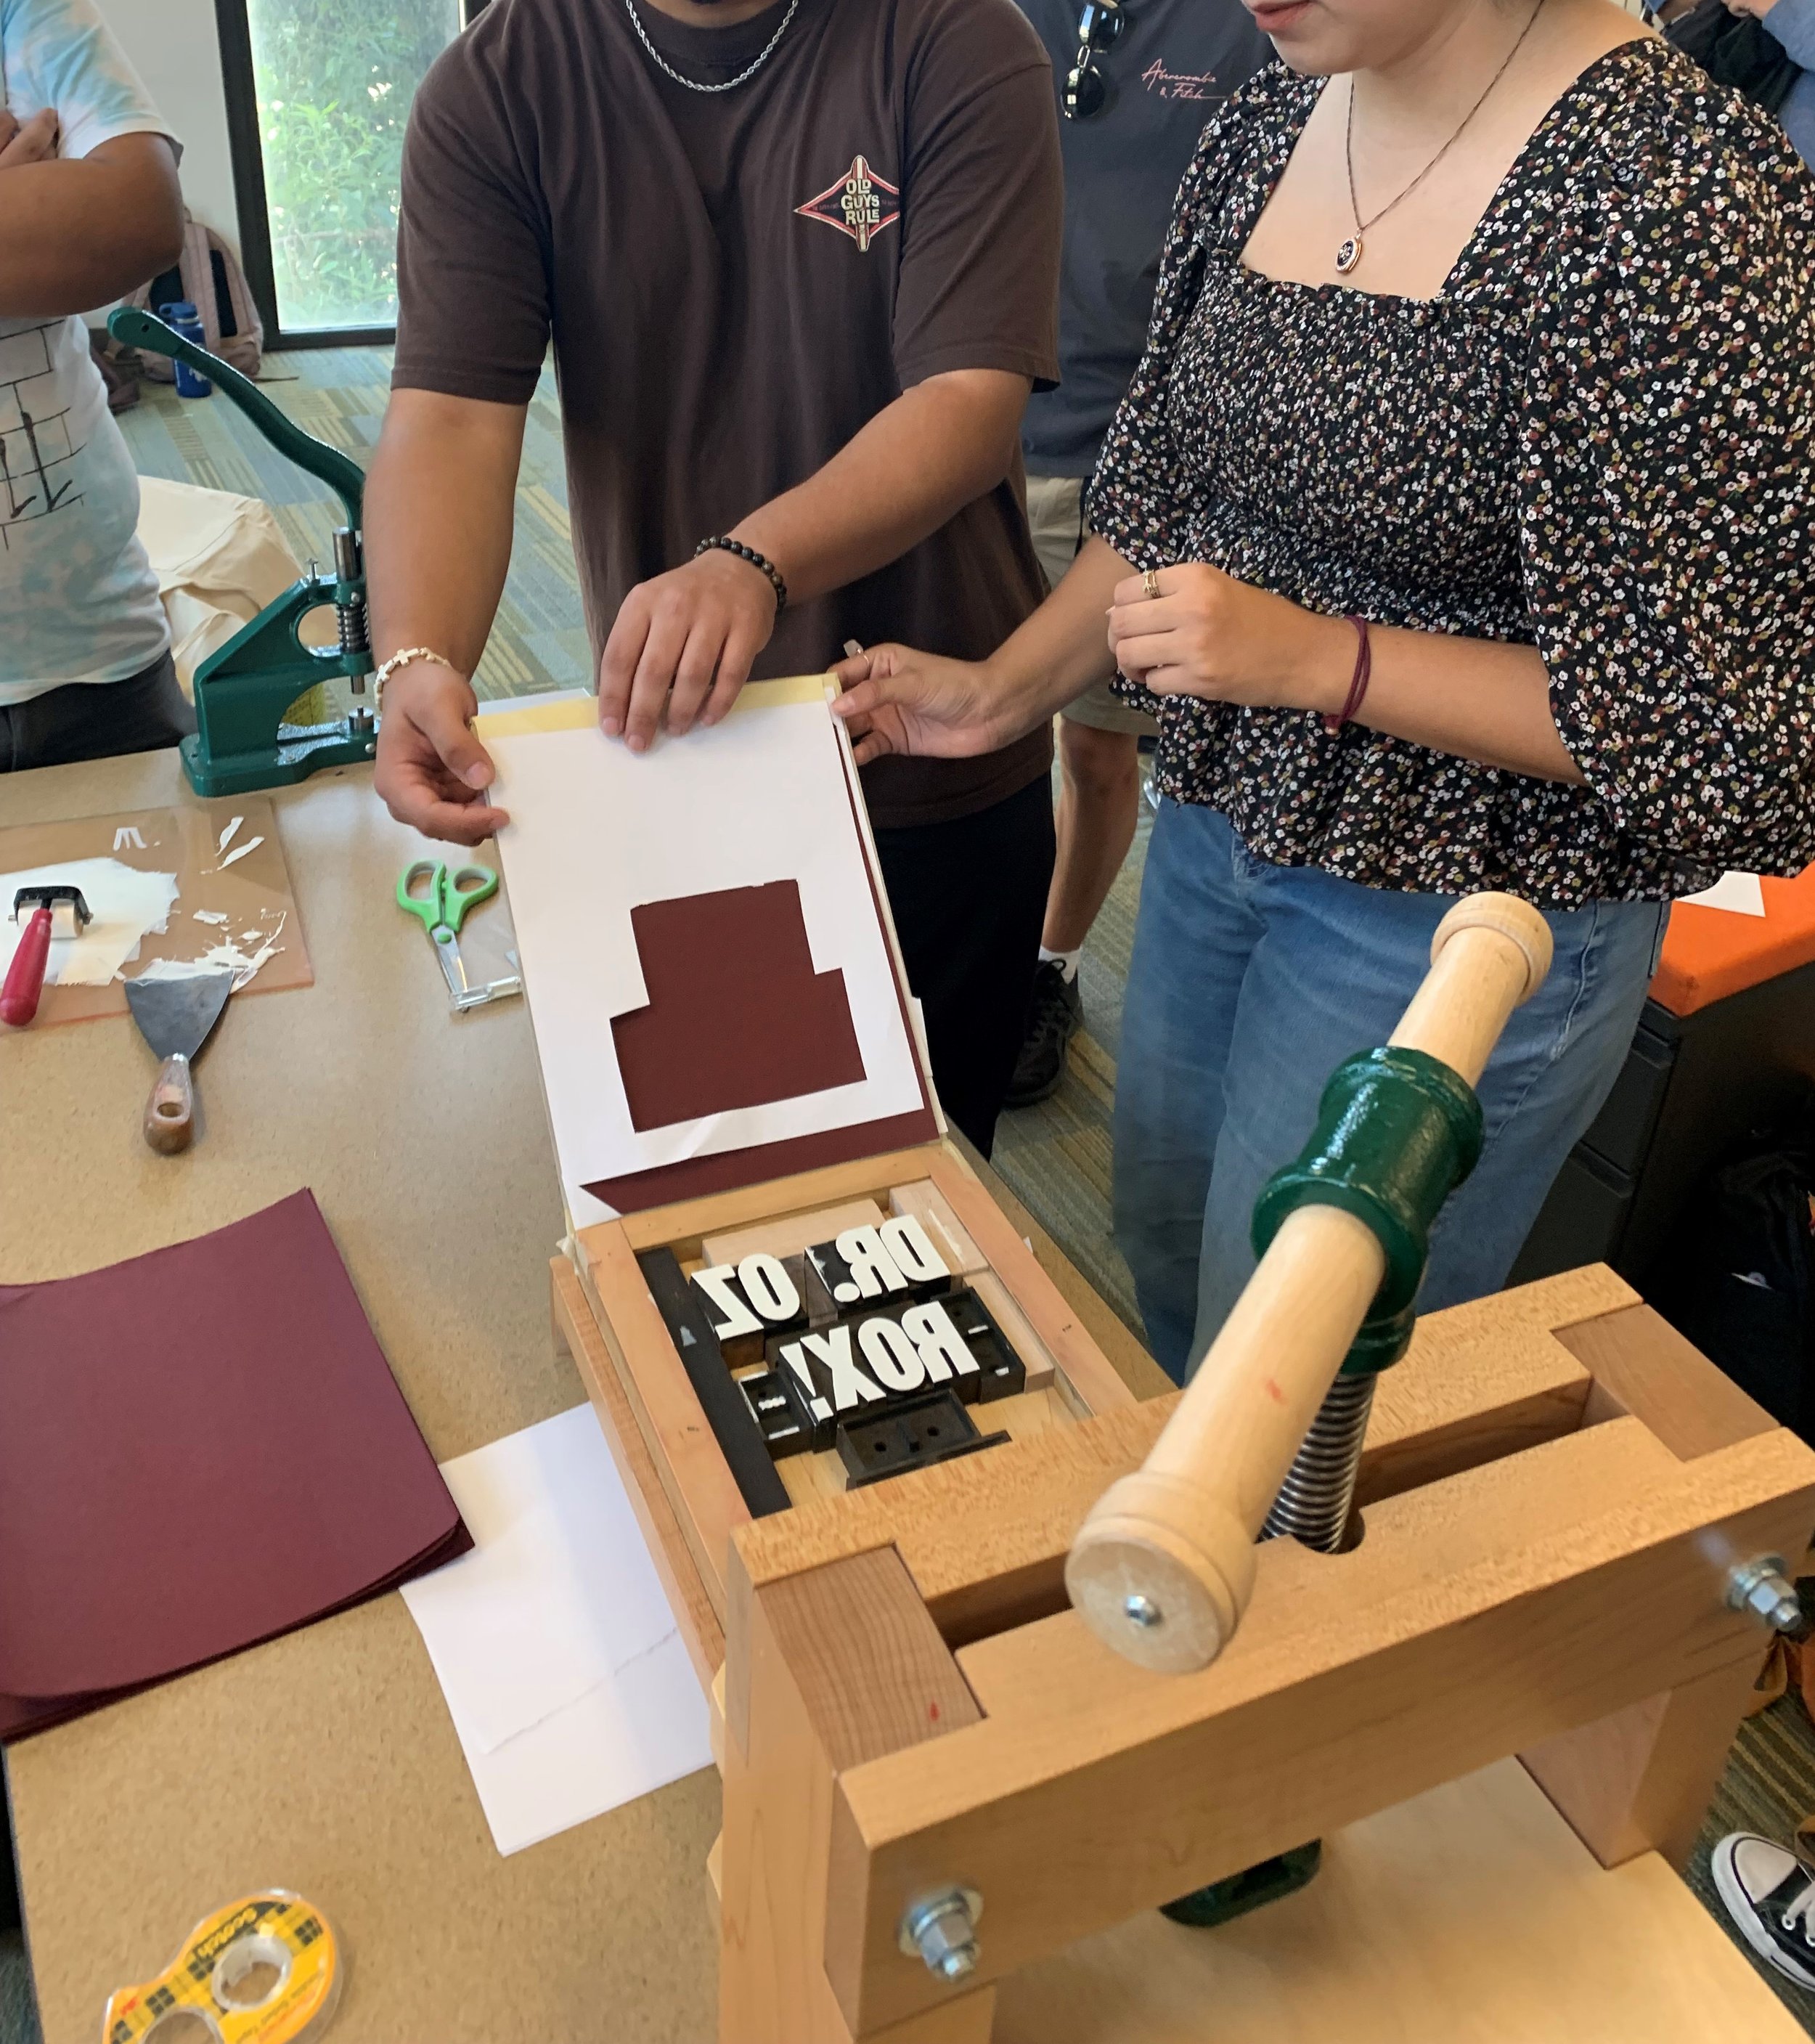
We’re running a very small letterpress shop. We have a Book Beetle press, which is effective if not very quick. The materials that come with it are great and very easy to pick up. I have a set of metal Garamond type and a set of wood type, the latter we tend to use more due to time constraints. We have a modern brayer and oil-based inks which we use on a piece of acrylic as an “ink stone.”
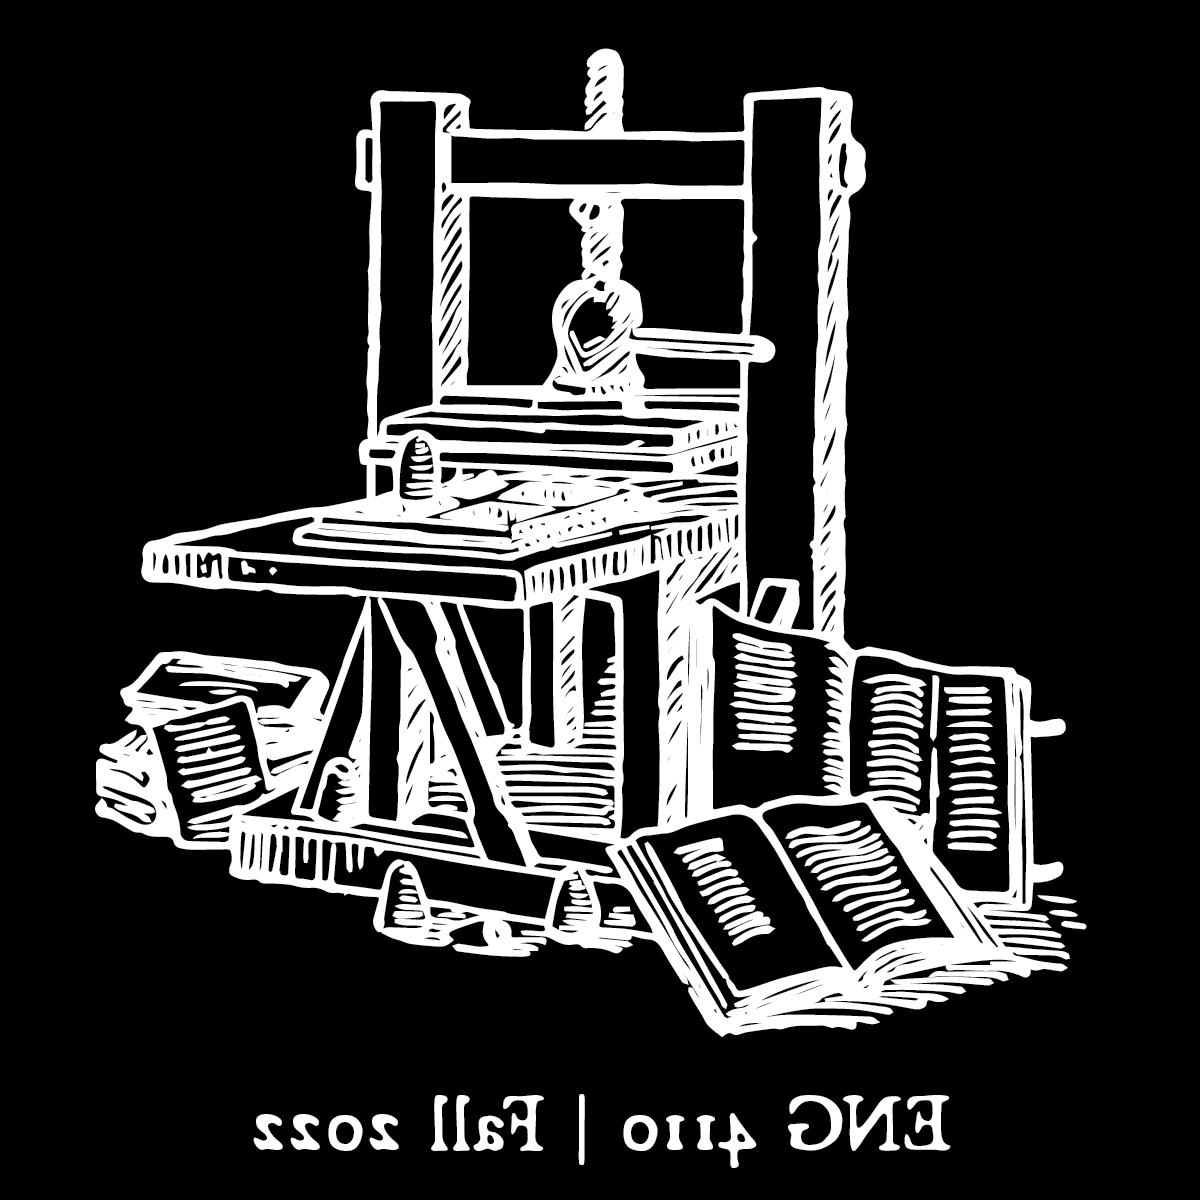
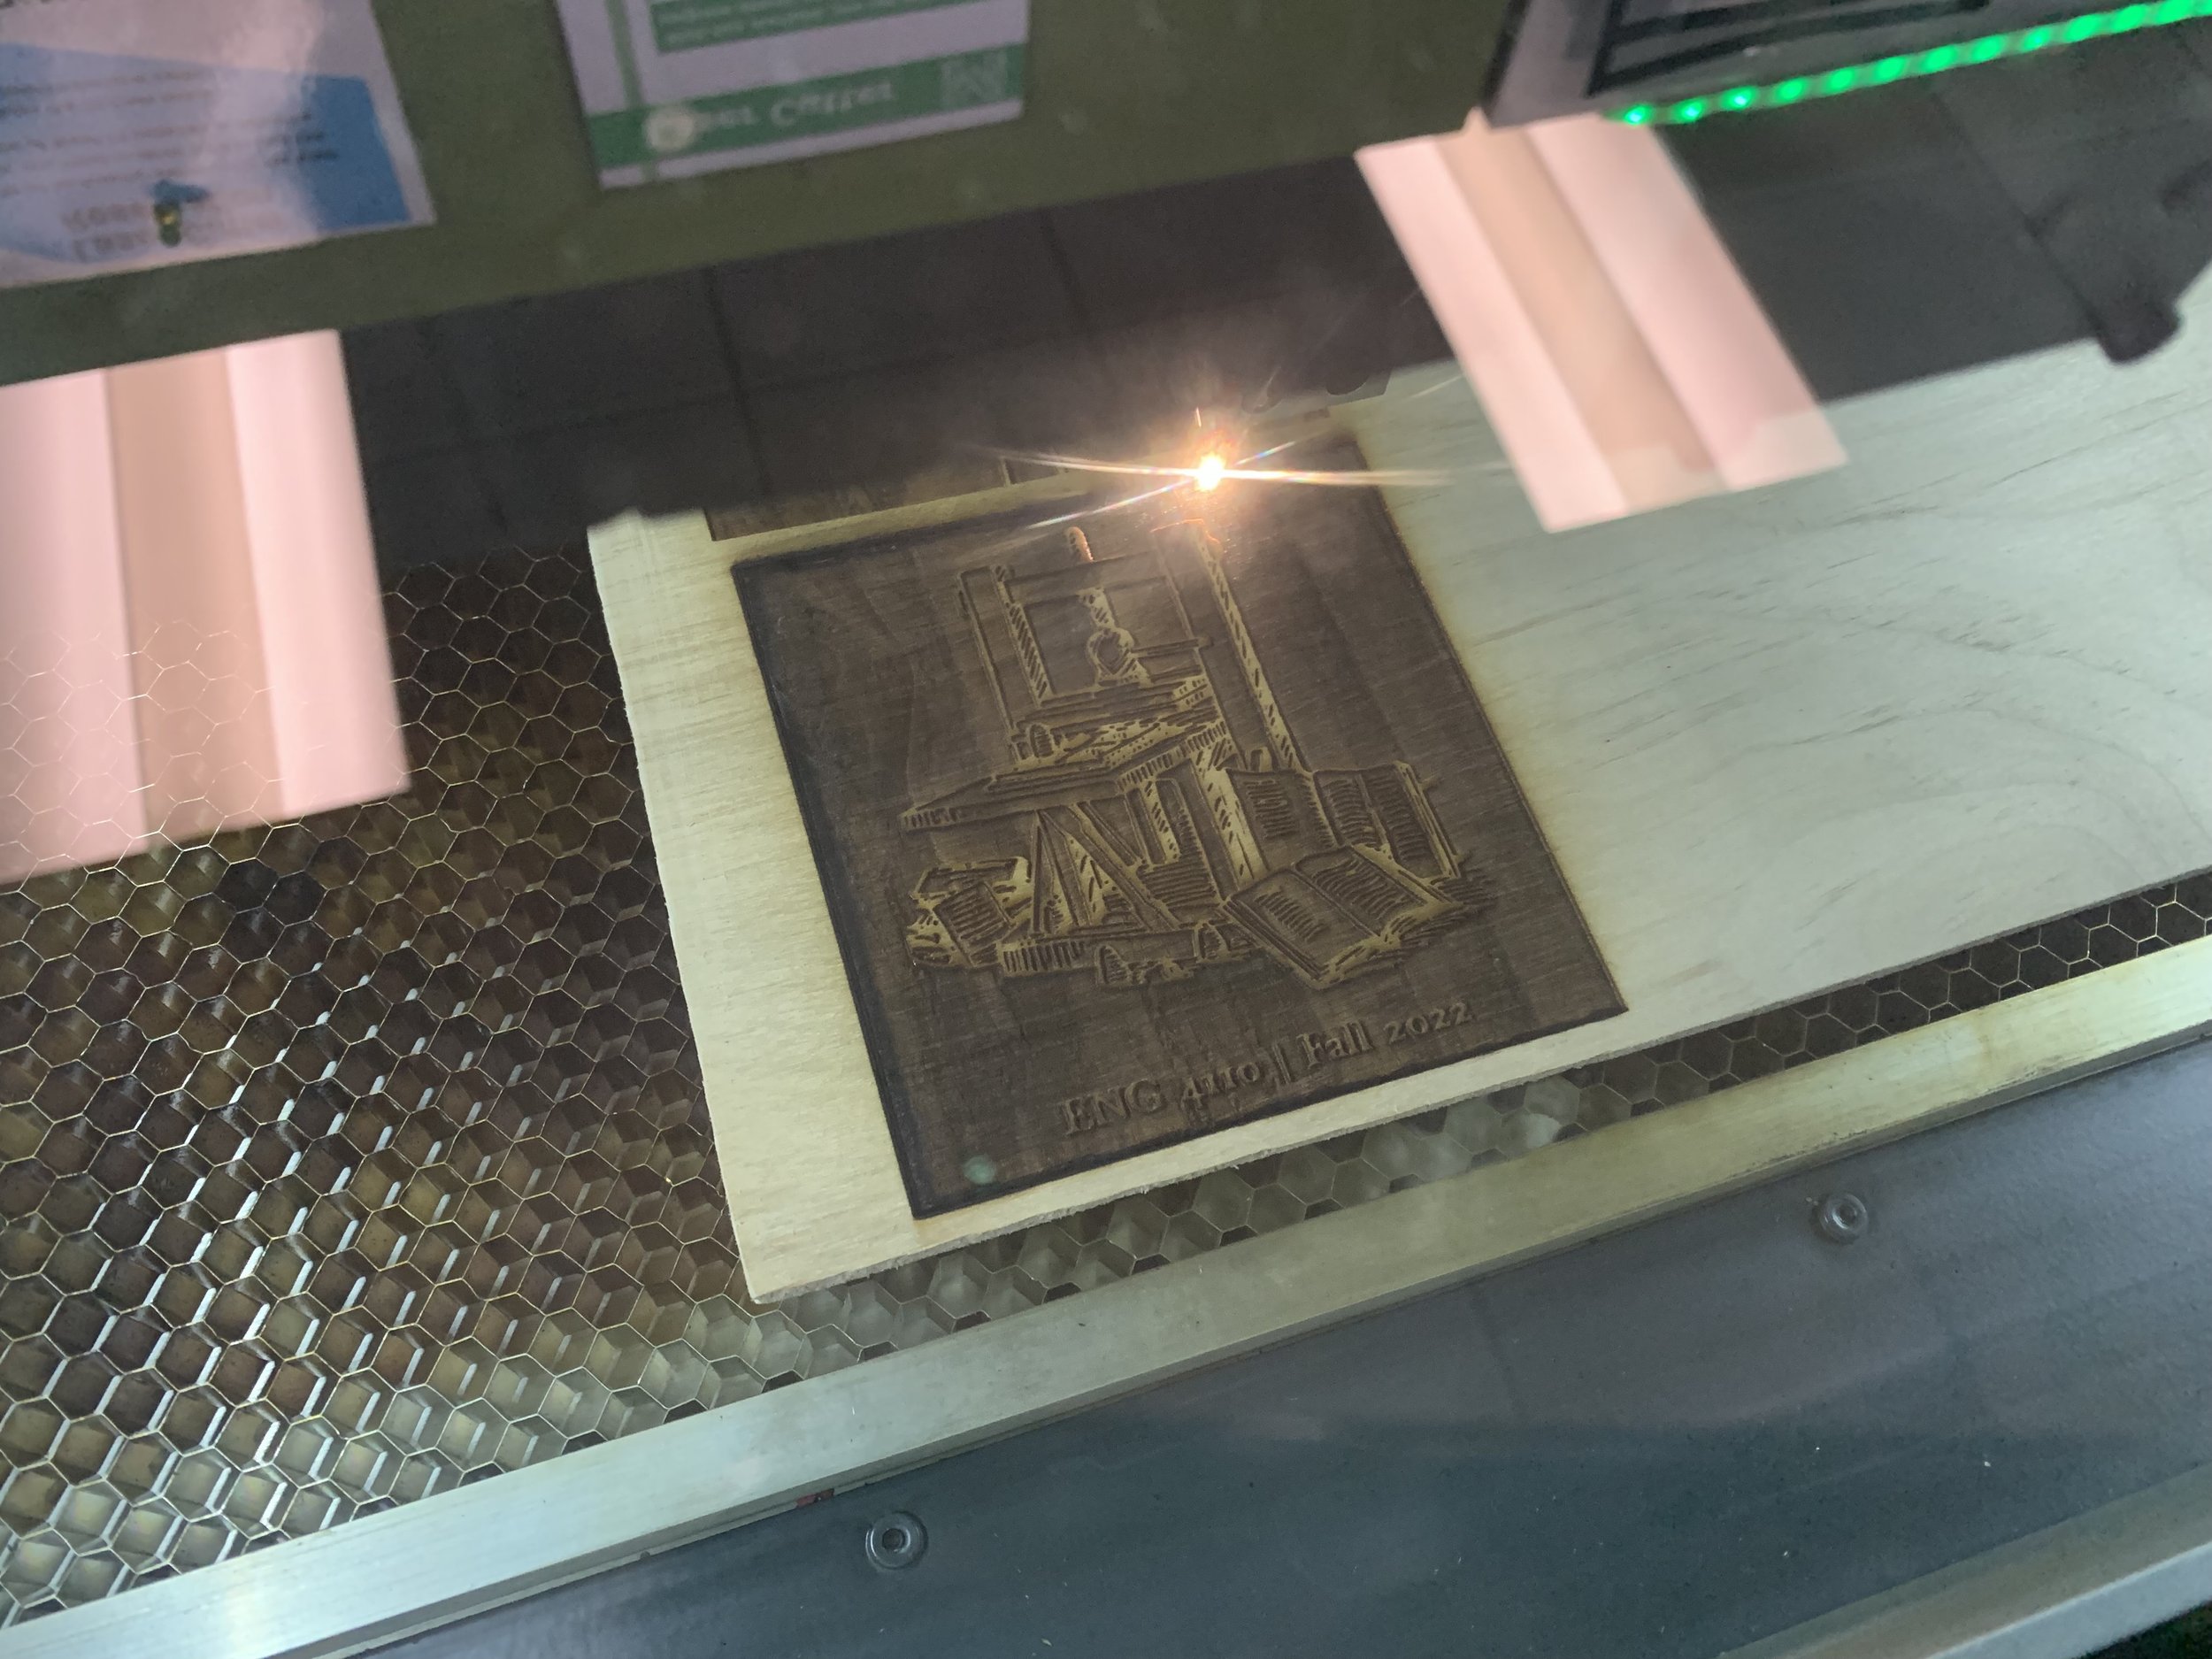
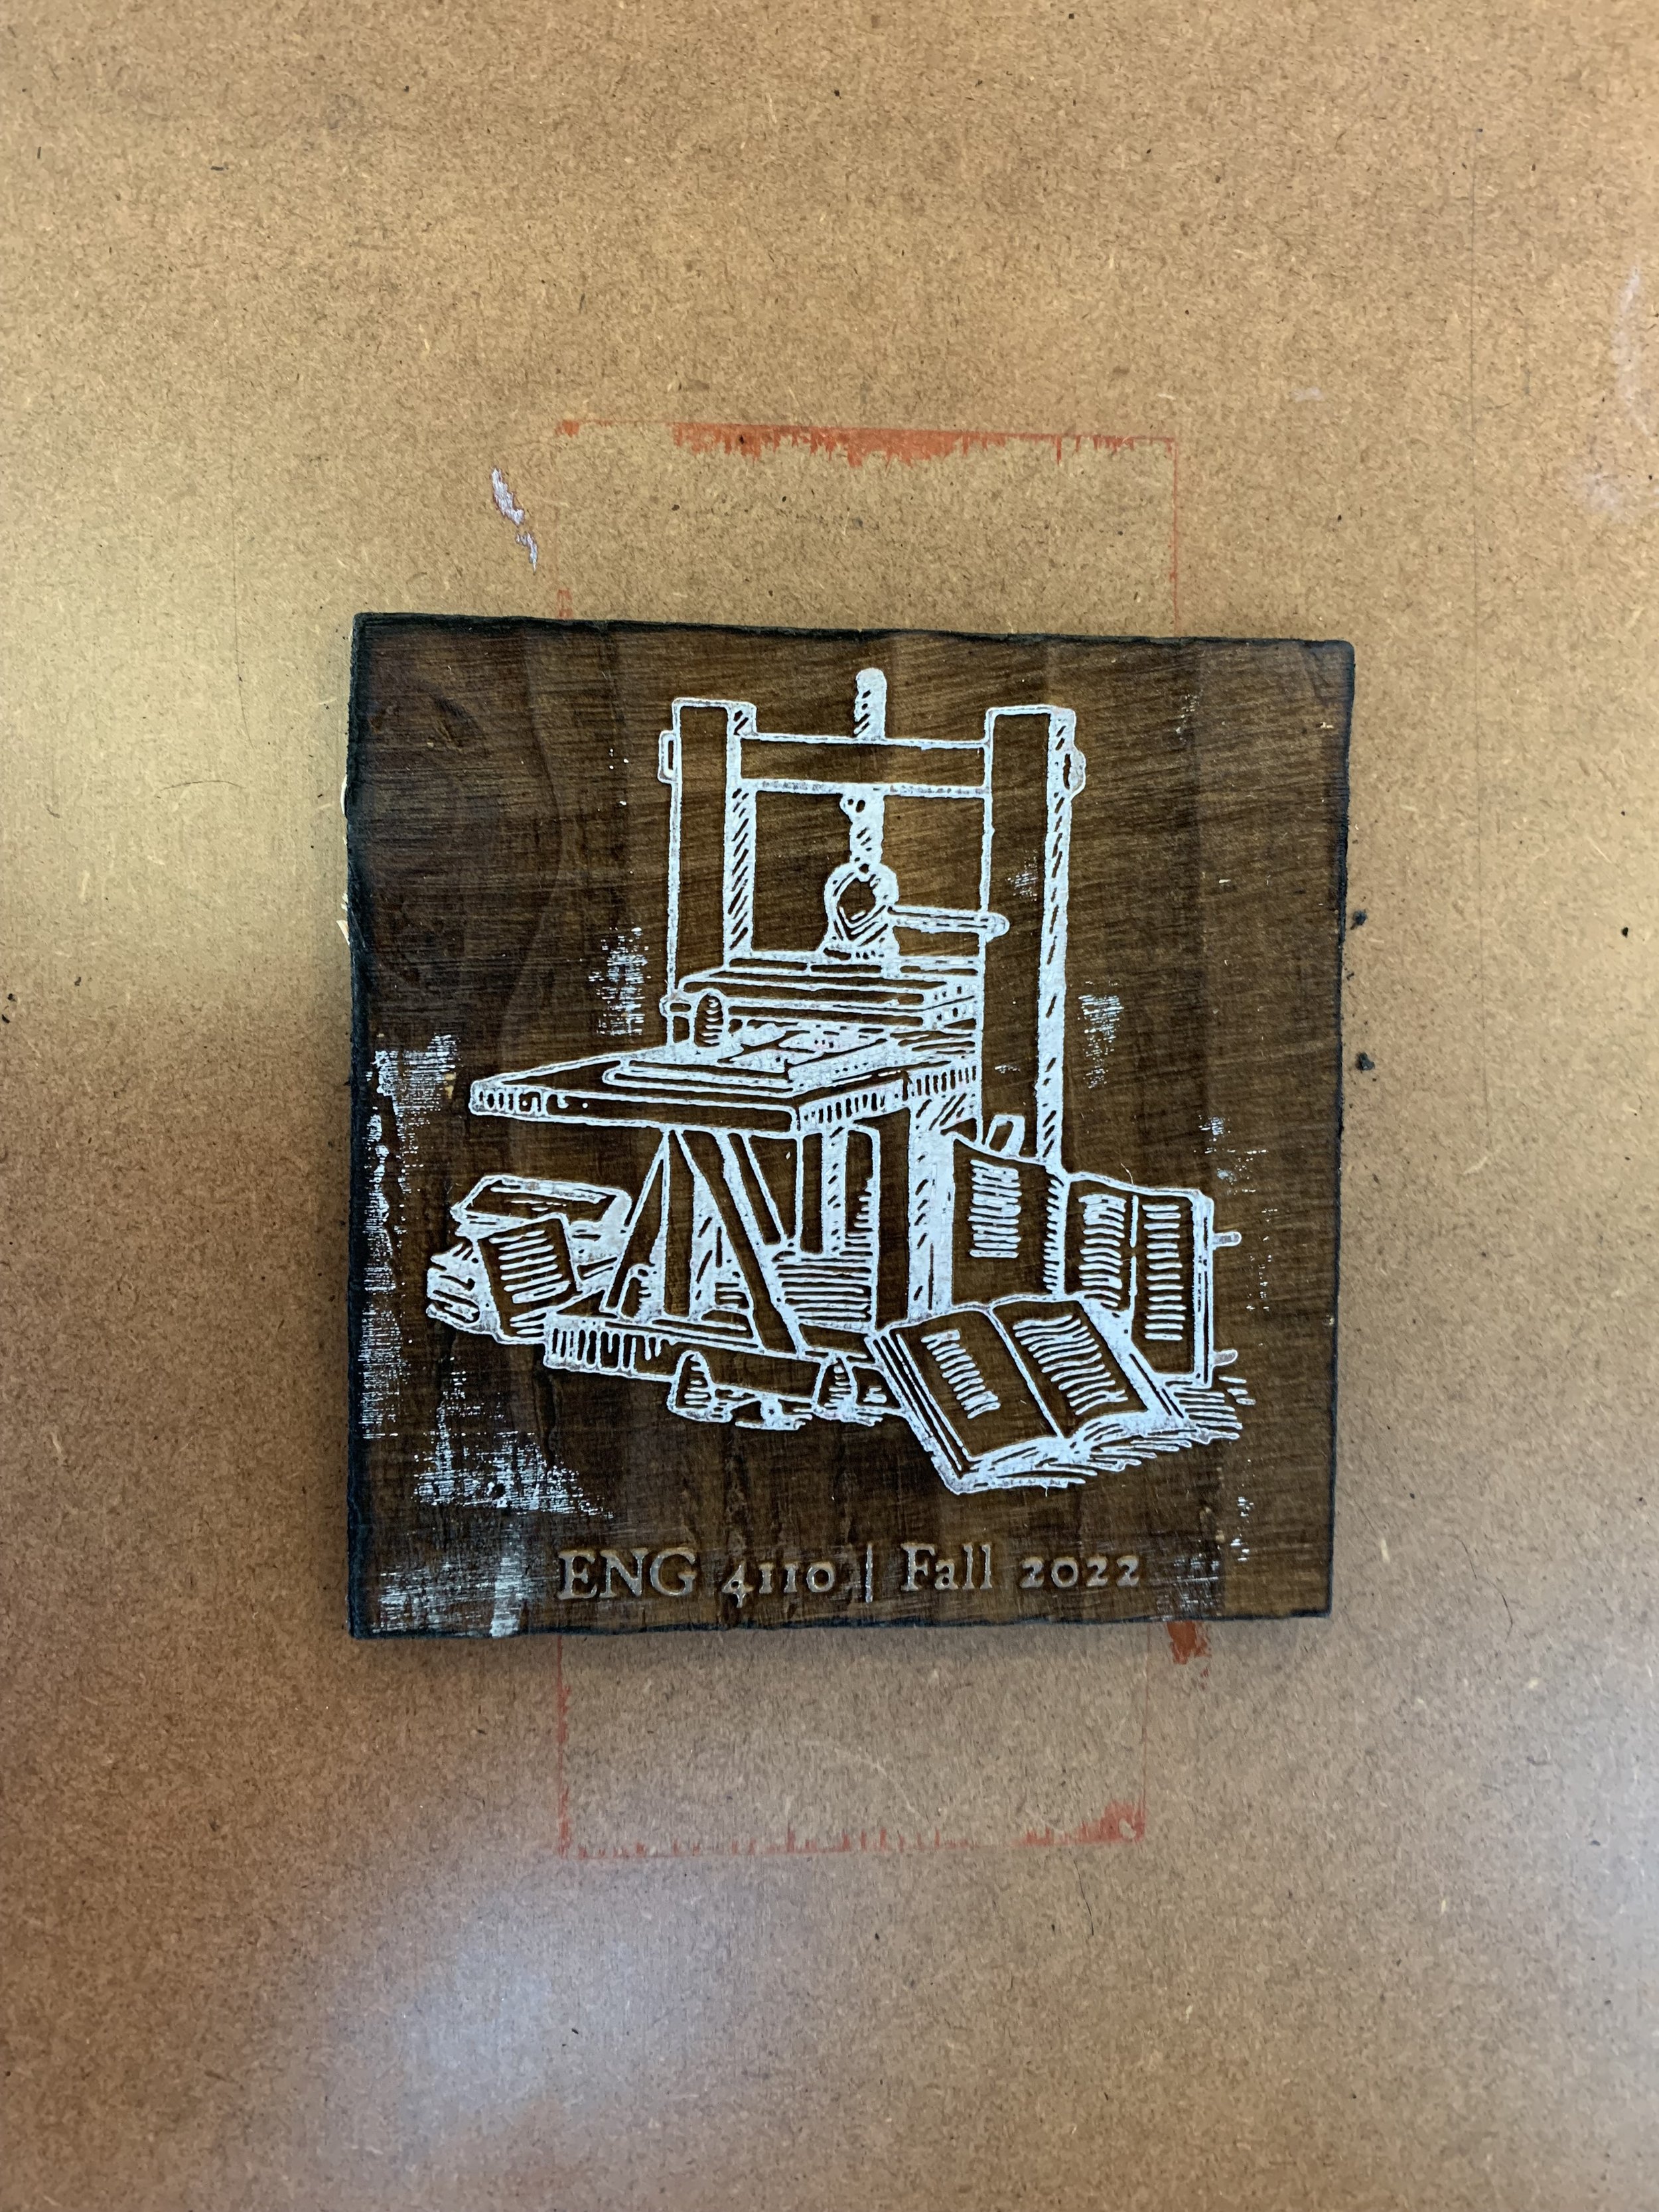
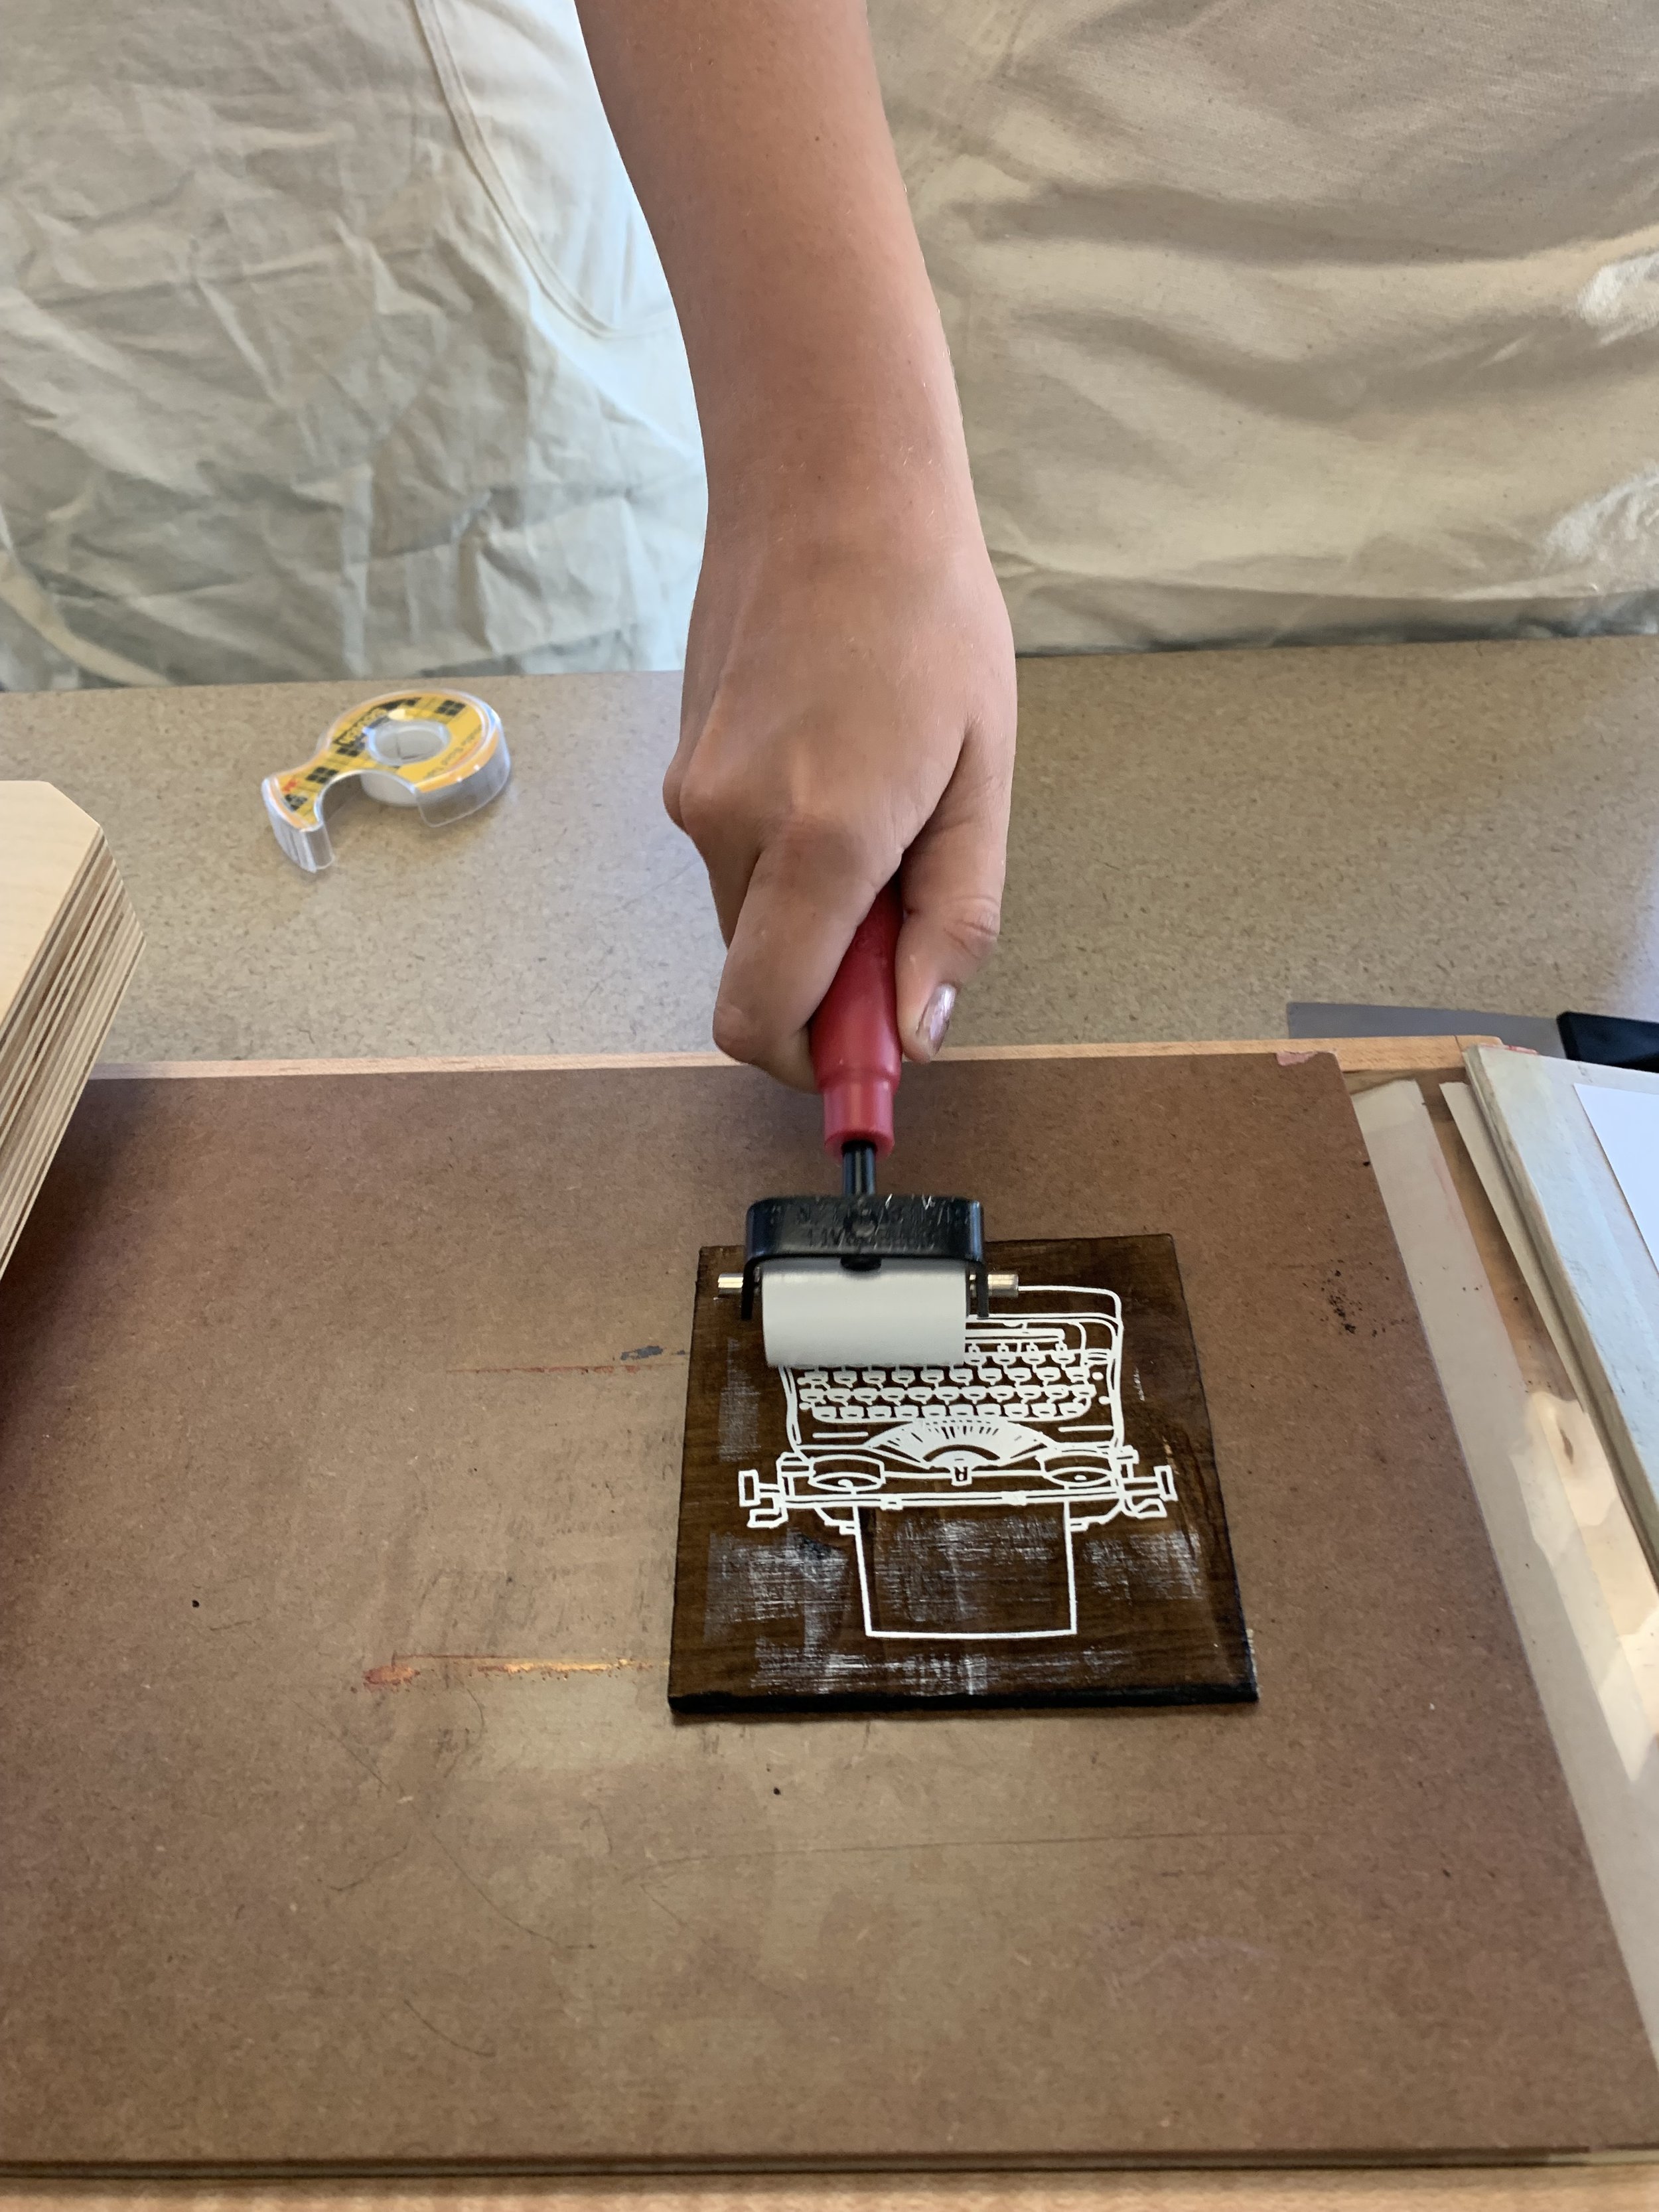
Set up, of course, is more work than the actual workshop. First, I cut down large sheets of paper for wrappers for the books, which were 11x8.5 paper folded in half. Secondly, I wanted to fabricate a woodblock specific to the course. I bought a sheet of 1/4 in maple plywood at Lowe’s for $22 and cut down with a hand saw to a size that fits in the laser cutter. I used Illustrator to make vector files that worked on the laser cutter; they were images of a common press and a typewriter. All images were 4 in squares because they could be changed out without using a new frisket. The white will not be engraved away by the laser cutter, since letterpress is relief printing. The black is cut away. You’ll also see I reversed the letters, which I forgot about on my first pass (visible in pictures below; just didn’t print the words). In addition to these images, I put a 4 in. square around the whole with the directive to cut around the square and engrave the image. For those of you who use laser cutters, here are the specifics of what I used:
Material: 1/4 in maple plywood
Engrave: high resolution, 75 depth, 80 speed (slower or deeper caused too much charring)
Cut: 75 heat, 10 speed, 100% depth, 2 passes
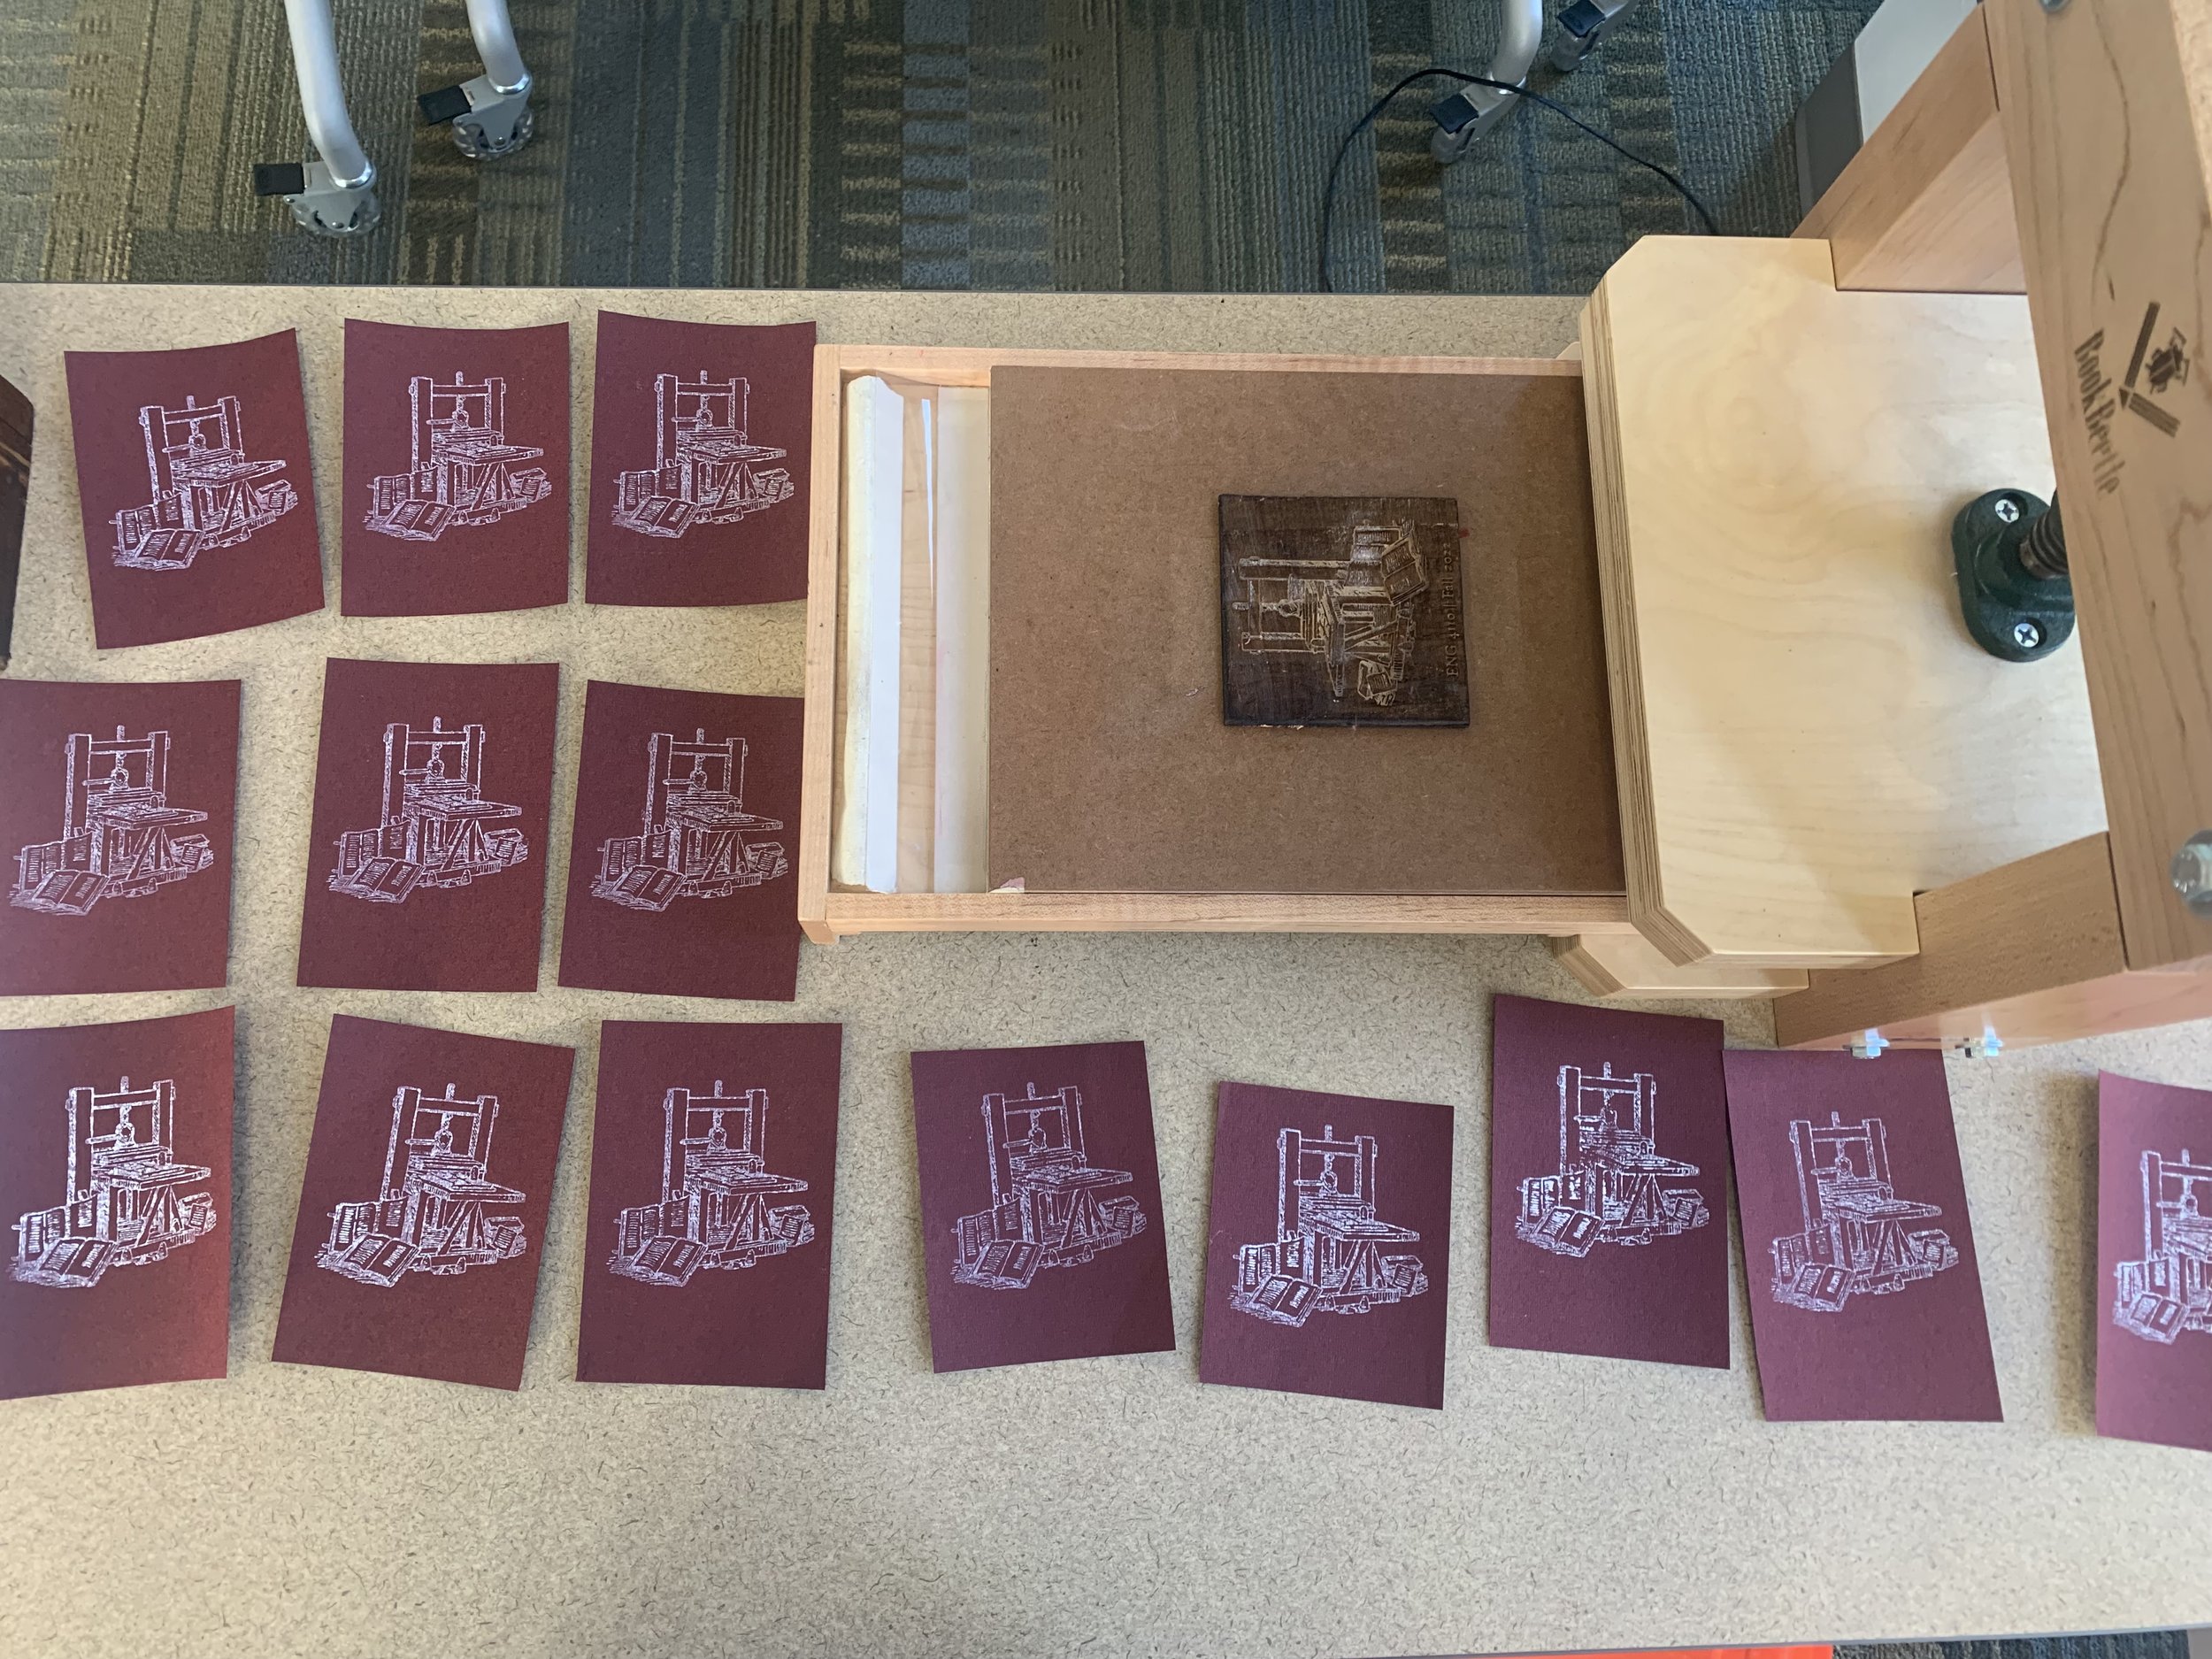
You might be wondering how we printed a 1/4 in block if type high is 0.918 in. I cheated a bit here. The Book Beetle comes with a block that polymer plates can be affixed to and printed. I used this and double-sided tape to attach the woodblocks to the block, and it printed perfectly.
Running the Workshop
Training involved going over terminology, the basics of how you set up and clean up, and safety issues surrounding the typewash, tools, and ink. I developed these materials as a part of this training, which you’re welcome to use with attribution:
After students were trained on the basics, we got started in three groups. I had 16 students at this point, as the other 9 were training on other machines as a a make-up from previous work.
Group 1: set Garamond type in composing sticks to learn how composition happened
Group 2: set wood type in the Book Beetle press and lock up with furniture and quoins
Group 3: use a woodcut fabricated on the laser cutter and begin printing
I gave groups 1 and 2 basic instructions and got them going before spending most of my time with group 3. We attached and cut a frisket, mixed ink, and printed our image before the wood type group finished. Then, group 3 transitioned over to set metal type and I took groups 1 and 2 together to talk about lockup and get them printing in turns. It was more students than could do every task, but everyone got to print and learned how to do the tasks and clean. I told them they’re responsible for helping each other out, and given the collaborative nature of the class, I think it’ll work out in the long term.
For the next class period, the following week, I ran the same structure with the remaining 9 students and focused on them printing wrappers for books we would bind on the following day. Seeing a freshly cut woodcut that still smelled like barbecue be printed seemed to be the most exciting part for students because it was easy for them to imagine doing the same. I also showed them where to get polymer plates fabricated.
Reflection (Repeat from Other Post)
As their wrap-up assignment, students were asked to do the following:
This week, we learned how to make things in the Maker Studio, which required pre-workshop training online and hands-on work with the Maker Studio ambassadors.
What was the biggest challenge of working with these tools? Or, what were you nervous about?
What was something exciting or something you are glad you got to learn?
Do you recognize any similarities between Maker Studio equipment and what we've seen from older periods? Think broadly here, about the basic logic of substrates, pigments, tools, etc.
How might you use the Maker Studio to create something bookish? In the broadest sense.
About the Author
Kate Ozment is assistant professor of English at California State Polytechnic University, Pomona. She has a book on Hroswitha Club forthcoming from Cambridge UP’s Elements series, and you can find her other work in Textual Cultures, Eighteenth-Century Studies, and Digital Humanities Quarterly. Contact her at: keozment (at) cpp (dot) edu.
-
October 2022
- Oct 16, 2022 Teaching in the Maker Studio Part Two: Safety Training and Open Making
- Oct 16, 2022 Teaching Book Forms
- Oct 16, 2022 Teaching Letterpress with the Bookbeetle Press
-
September 2022
- Sep 24, 2022 Making a Scriptorium, or, Writing with Quills Part Two
- Sep 16, 2022 Teaching Cuneiform
- Sep 4, 2022 We're Back! Teaching Technologies of Writing
-
June 2020
- Jun 1, 2020 Black Lives Matter
- May 2020
-
April 2020
- Apr 1, 2020 Teaching Materiality with Virtual Instruction
- March 2020
-
February 2020
- Feb 1, 2020 Making the Syllabus Zine
-
January 2020
- Jan 1, 2020 Teaching Print History with Popular Culture
-
December 2019
- Dec 1, 2019 Teaching with Enumerative Bibliography
-
November 2019
- Nov 1, 2019 Finding Women in the Historical Record
-
October 2019
- Oct 1, 2019 Teaching in the Maker Studio
-
September 2019
- Sep 1, 2019 Graduate School: The MLS and the PhD
-
August 2019
- Aug 1, 2019 Research Trips: Workflow with Primary Documents
-
July 2019
- Jul 1, 2019 Research Trips: A Beginner's Guide
-
June 2019
- Jun 1, 2019 Building a Letterpress Reference Library
-
May 2019
- May 1, 2019 Teaching Manuscript: Writing with Quills
-
April 2019
- Apr 1, 2019 Why It Matters: Teaching Women Bibliographers
- March 2019
-
February 2019
- Feb 1, 2019 Roundup of Materials: Teaching Book History
-
January 2019
- Jan 1, 2019 Building and Displaying a Teaching Collection
-
December 2018
- Dec 1, 2018 Critical Making and Accessibility
-
November 2018
- Nov 1, 2018 Teaching Bibliographic Format
-
October 2018
- Oct 1, 2018 Teaching Book History Alongside Literary Theory
-
September 2018
- Sep 1, 2018 Teaching with Letterpress
-
August 2018
- Aug 1, 2018 Teaching Manuscript: Circulation
-
July 2018
- Jul 1, 2018 Setting Up a Print Shop
-
May 2018
- May 1, 2018 Teaching Manuscript: Commonplace Books
-
April 2018
- Apr 1, 2018 Getting a Press
-
March 2018
- Mar 1, 2018 Teaching Ephemera: Pamphlet Binding
- February 2018


